Has your old computer stopped working after so many years? Well yes, it can happen, they are electronic devices that may no longer work over time. This is also due to technological evolution, which makes even PCs purchased not so long ago obsolete. Anyway, your long-awaited one has finally arrived New laptop: it is still in its packaging but you already have the first doubts about what to do when you turn it on for the first time.
If that's the case, fear not - throughout this guide I'll tell you How to set up a new laptop illustrating the initial Windows setup procedure, suggesting the best settings to apply later and pointing out some of the best programs to install to work right away in the best possible way.
What are you waiting for then? If you follow this guide carefully, I'm sure you will succeed and you won't have any problems using your new notebook. Having said that, I just have to wish you a good reading and good luck for everything!
Index
How to set up a new laptop with Windows 10
If you have purchased a portable PC, the probability that it is installed inside it Windows 10 she is very tall. In fact the latest home operating system Microsoft it is pre-installed in most of the laptops on the market; unless you bought an Apple product (so a MacBook), a laptop with FreeDOS or with Linux (alas quite rare to find in shops).
Below I show you the steps for set up a laptop with windows 10 in the best way.
Account setup
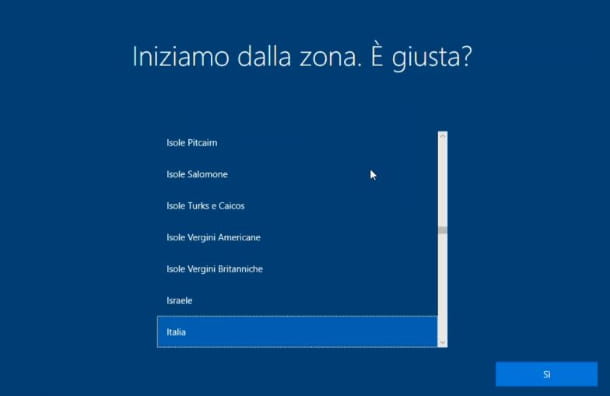
Let's get started right away with setting up your new laptop. When switched on, the guided configuration of will appear on the screen Windows. The first screen that will appear will be the one for select your language: choose the one you prefer (presumably Italian) and press the button Submit.
Windows will introduce you Cortana, his voice assistant introduced in Windows 10. If you want to disable his voice, you can click on the microphone icon, bottom left. At the end of Cortana's speech, you have to choose the area where you are and press the key again Submit.
Then select the keyboard layout and the second layout (this is useful if you are also used to writing with a different type of keyboard than the one you have chosen as default).
Here, now, is a fundamental passage: we must connect to the Internet to complete the setup. If you have one WIFI network, check the box with your phone's name network, click here connect and inserted the key of access; finally, press up NEXT.
You will see the Windows 10 license agreement, which I advise you to read and then accept using the appropriate button at the bottom right. Here: at this point you should be on Microsoft account sign in screen.
At this point you have the possibility to make two choices: create a Microsoft account or local account. Want to know what the differences are? I'll show you the key ones below.
THEMicrosoft account allows you to access many of the Microsoft devices and services, always using the same credentials. Your account information is saved on Microsoft servers. You will have the opportunity to sync all your personal files, so you can have them on all devices. You will also have access to all the services offered by Microsoft (Office, Skype, Xbox Live, OneDrive, etc.)
To proceed with this solution, you will need to enter your email address, if you already have a Microsoft account; otherwise you will have to click on the entry Create account and follow the wizard. If you're having difficulty crafting, I've written a guide about it.
THElocal account instead, it is associated with the single computer: to access you will have to choose a username and a possible password. If you use several computers, you will need to create a new one for each one. If you want to find out how to create a secure password, I refer you to my dedicated guide.
To create a local account the matter is slightly more complicated. In fact, you should know that Microsoft, starting from version 1903 of Windows 10, forces you to log in with a Microsoft account, no longer showing the possibility of continuing with an offline account. Don't despair though.
There is a "trick" that will allow you to bypass the requirement to log in with your Microsoft account. To do this, you will have to turn off the router from which you are connected via Wi-Fi or physically disconnect the network cable. In this way, when you try to create the account you will see the message "Something went wrong", after which you just need to click on the button Salta and you will proceed with the creation of the local account. So enter a username, choose one Password And that's it.
Continue the guided configuration, choosing the settings you prefer for the Vocal recognition online, the use of your position, the possibility of locate the device in case of theft or loss etc. After making all the choices, you will finally find yourself in front of the desktop in Windows 10. If some steps are not clear to you, you can read my guide on how to install Windows 10, in which you will find the entire initial configuration procedure for the operating system.
If you have decided to access your PC with a Microsoft account, I recommend that you facilitate and speed up the Windows logon procedure by setting up a PIN. To do this, just type "Access options" in search bar located at the bottom left and press the key Submit on the keyboard. On the page that opens, select the item "PIN di Windows Hello and then click manage. To find out more, you can consult my dedicated guide.
Network connection
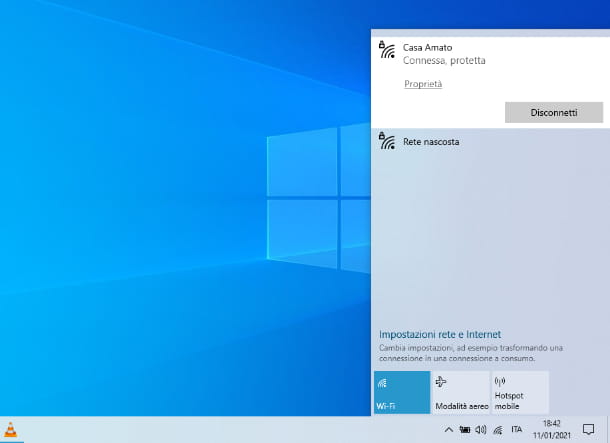
After you've finished the initial setup, you may need to connect your new laptop to the internet. You basically have two ways to do this: in Wi-Fi or via Ethernet cable.
If you choose wireless mode (and you have a Wi-Fi-enabled computer), just click thewaves icon located at the bottom right (near the system clock): a box will open with all the wireless networks available nearby. Then select the network you want to connect to and, if it has a password, enter it in the appropriate box and click on the button connect.
If, on the other hand, you want to opt for the wired solution, you will need to have an Ethernet cable and connect the two ends, one in the computer network port and the other in one free network port of the modem/router, which is usually found in the back. No need for other configurations.
In case of doubts or problems on how to connect your PC to the Internet, read my guide dedicated to the subject.
Removing unnecessary software
After connecting the computer to the Internet, a fundamental operation to do is to remove any unnecessary pre-installed software on the same (problem generally found in PCs sold by large electronics chains). Slangly called bloatware, these programs are entered by the producers themselves for commercial agreements entered into with the various software. Often these are trial version security software or programs for editing or playing media.
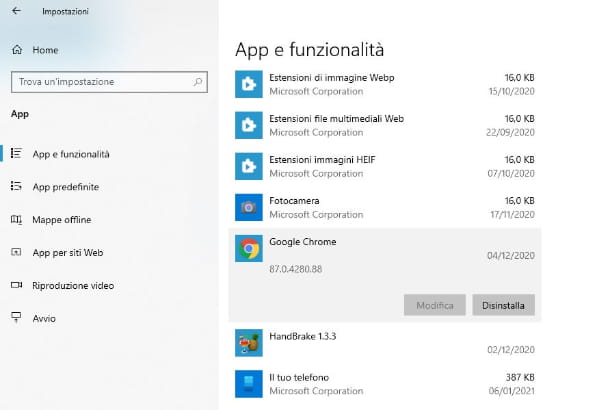
To remove these programs you need access to Settings Windows: to do this, press the button Home (the flag icon located in the lower left corner of the screen), then click on thegear icon located in the opened menu and, in the window that opens, click on the icon App.
You will see all the programs installed on your computer on the screen. To uninstall applications that are not useful to you: click once on the name of the one you want to delete and press the button Uninstalltwice consecutively. Then follow the instructions on the screen (generally just always click on Avanti/Next) and lo and behold, the program will no longer be on your PC.
Repeat these steps for all the programs you want to uninstall. For more information, I invite you to read my guide on how to uninstall programs from Windows 10.
There are also programs that do start automatically when you turn on your computer, making the startup process slower. It is good practice to "reduce" the list of these programs and remove all those that are not needed. To do this, right click on it taskbar (the one you find below) and select the item Activity management give the menu check if you press.
Thanks to this operation, the next time you turn on the PC, those programs that you have disabled will no longer start, making Windows startup faster.
Virus and malware protection
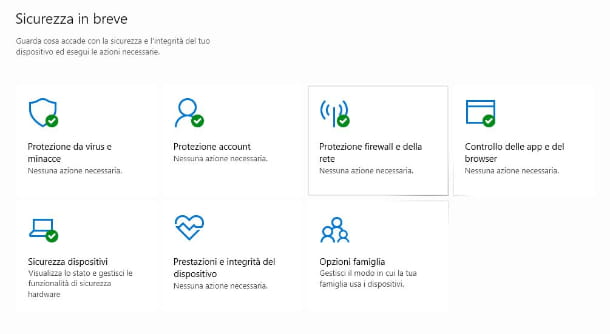
To avoid unpleasant inconveniences, a good and right operation to carry out is to use a good antivirus. Windows 10 makes you available Windows security, Also known as Windows Defender, which is included "standard" in the operating system and has an excellent malware recognition engine (testified by all the major antivirus rankings).
To check that Defender is active on your PC, you must press the button Home, to write “Windows Security” in the search field and press the key Submit on the keyboard. In the window that opens, you should find a summary screen. If all tiles have a green check mark, it means that Windows Defender is active and you don't have to do anything else; otherwise click on the options to activate all the protections. For more information on using this software, I refer you to my dedicated guide.
Obviously there are many alternatives to Windows Defender, both free and paid, if the program does not convince you: if you want to find out which are the best, I wrote an article dedicated to the best antivirus for Windows 10.
The use of an antivirus is of fundamental importance, but sometimes it may not be enough; for this my advice is to also download a anti-malware. An anti-malware is a software that doesn't conflict with the antivirus (provided you don't always keep it active in the background), but goes to find computer threats that could escape the former.
Anti-malware is often free to download. What I feel like recommending is definitely Malwarebytes, great software that is available for free. It also has a paid version, which includes some more features, such as background scanning (which I don't recommend though, if you already use a good antivirus). What I recommend you do is run a manual anti-malware scan periodically. For more information on Malwarebytes Anti-Malware, read my guide on it.
Energy saving settings
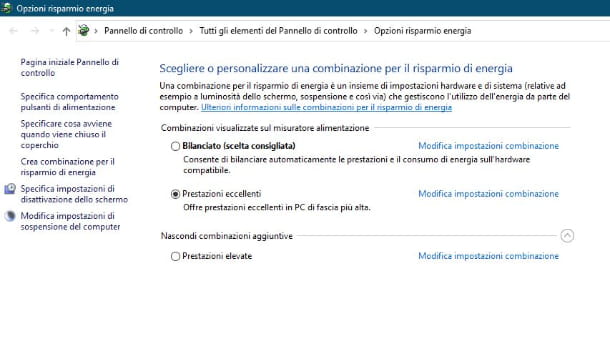
Another important thing to do when setting up a new laptop is to adjust the energy saving options, which allow, among other things, to extend battery life or increase performance of the system, choosing customized combinations.
To adjust these settings, just right-click on thebattery icon located in the application bar, bottom right, and select the item Energy saving options. You will be faced with a screen with the default combinations of your PC.
You can choose a predefined combination or create one of your choice. If you want to create a new one, you will have to click on the writing on the left Create power plan and follow the wizard. For example, you can choose how long the display stays on when it's mains or battery powered.
For more information, I invite you to consult my tutorial on how to increase notebook battery life.
Software installation
Let's move on to now download and install software for your PC. Let's start with what is practically the fundamental tool for surfing the Internet, the browser.
You might also need one document creation suite, presentations or spreadsheets. If you don't want to spend money on the famous Microsoft Office, the best solution you can turn to is called LibreOffice: one of the best free alternatives to the suite of the Redmond giant, free, open source and completely in Italian (perfectly compatible with Office documents). To learn more, you can consult my tutorial on this.
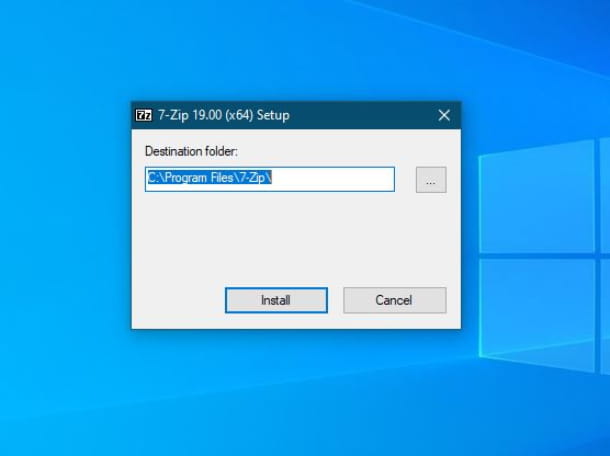
Browsing the Internet sooner or later you will come across some types of files, I'm talking about archives compressed in formats such as .zip, . 7z e .rar. These are containers that can include different types of files and "lighten" them through effective compression algorithms. Windows is capable of opening files in .zip format on its own, but for other archive formats you need a third party program: the software that I want to advise you in this regard is 7-Zip, which is free and open source. To download it, I invite you to read this article where I explained everything to the fullest.
Another very useful software is absolutely VLC media player, a program, also free and open source, capable of playing most formats of multimedia files, both audio and video, without the need for external codecs. I invite you to read my article to find out how to best download and use it.
If you need software forediting on photos, my advice falls on GIMP, an excellent free and open source alternative to Photoshop. I talk more about it in this guide.
Do you need a program for editing or creating videos? In this article you will find several that may be right for you.
Another fundamental tool, which I invite you to install on your PC is a password manager, which allows you to memorize the access credentials to all sites and online services by automatically filling in the login data; all protected by a single master password. I told you about what I think are the best in this article.
Device installation
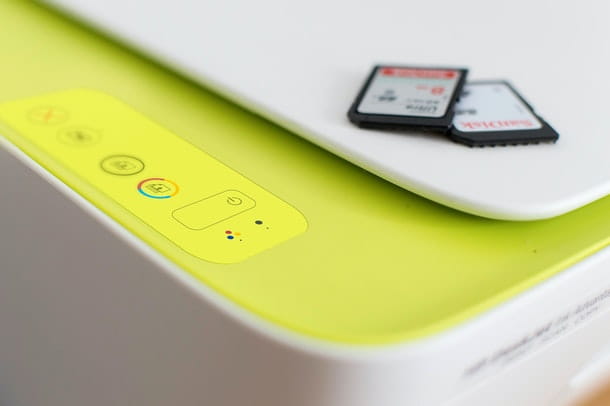
You can also add external devices to your laptop, like printers o scanner. Generally, all newer devices are automatically recognized by the PC and configured as soon as they are connected to the PC.
In other cases it may be necessary to download the drivers for a device from the Internet (strictly from the manufacturer's website, to avoid potential malware!) and install them manually, so that communication between the device and Windows can take place correctly. In still other cases, the drivers are supplied with the device on physical media (e.g. CD).
A very important operation to carry out is to always keep updated drivers. I wrote a guide about it, in case you need it.
If, on the other hand, you want to know in particular how to connect your PC to the printer, I refer you to my dedicated guide; the same goes for the scanner.
How to set up a new Mac laptop
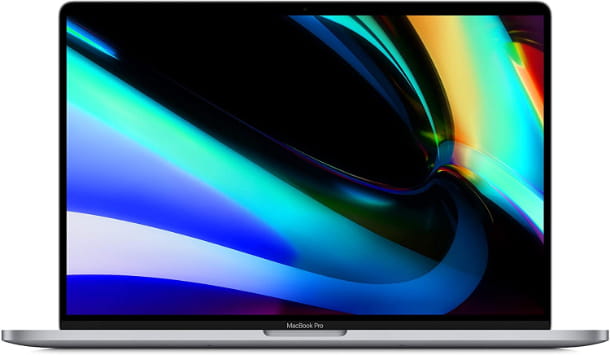
How do you say? The laptop you bought is not a Windows notebook, but a MacBook?
In this case, at the beginning of the setup you will have to select the language, the country and the keyboard layout, then you will have to connect to a wireless network to which you want to connect and accept the terms and conditions of the agreement from Apple. You'll also need to set up Siri (Apple's voice assistant) and Touch ID, if available on your Mac model.
For the rest, I advise you to carry out almost all the operations I told you about before for notebooks with Windows (except the installation of antivirus, not yet necessary on macOS). For more information, I refer you to my guide on how to install macOS Big Sur (in which I also told you about the first steps to take in macOS) and to my tutorial on how to speed up your Mac, which contains lots of useful tips on how to improve operating system performance.
Deprecated: Automatic conversion of false to array is deprecated in /home/soultricks.com/htdocs/php/post.php on line 606


