You were recently gifted with a smartwatch made by Amazfit, a company specialized in making wearable devices connected to Xiaomi: it was certainly a very welcome surprise and you can't wait to start using it. Unfortunately, however, you are not particularly familiar with these devices and you are not sure where to start. In any case, you were able to learn, while talking to your friends, that it is particularly important to synchronize the watch with your smartphone using the app designed for this purpose: this would allow you to be able to take advantage of a wide range of additional features and more accurate monitoring of the various parameters recorded by the device.
You have therefore decided to overcome this technological obstacle and you immediately set out in search of the instructions on how to connect amazfit to phonethus landing on my site. Well, know that today is your lucky day: in fact, I have created the following guide specifically to explain all the steps necessary to carry out this operation which, as you will soon see, does not involve particular difficulties.
All you need to do is dedicate just a few minutes of your precious time to reading the next paragraphs to succeed in your intent and thus fully enjoy the countless functions of the device in question. So, have I convinced you? Perfect, in this case I can only wish you a good reading and, above all, have fun with your new Amazfit smartwatch (or smartband)!
Index
How to connect Amazfit to your phone
As you will be able to verify for yourself shortly, it is not at all difficult to understand how to connect amazfit to phone: whatever the model of SmartWatch o smartband produced by the aforementioned brand that you have, the procedure to follow is substantially the same, with only a few small differences related in particular to the methods of pairingi.e. pairing, Bluetooth.
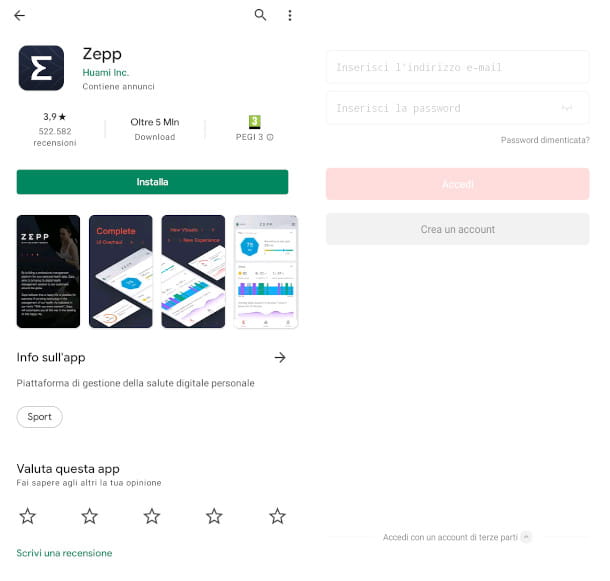
In any case, in all cases it is necessary to install the reference application on the smartphone which, as far as the Amazfit brand is concerned, corresponds to Zepp. The latter is available for both Android devices (also check on alternative stores if your smartphone does not have Google services) and iOS.
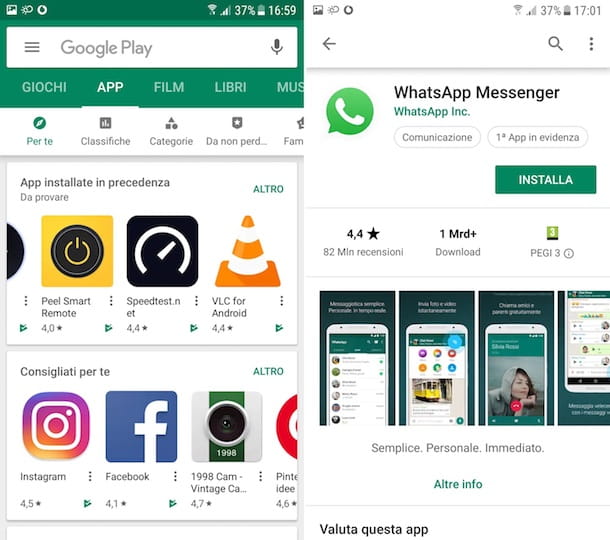
To start using it, just press the link above and press the button Install (Android) or Get (iPhone) and wait for the download and installation. Furthermore, as regards Apple mobile devices, you will also be asked to verify your identity via Face ID, touch ID o password dell'ID Apple.
Next, start the Zepp app by pressing the icon that appears in Home Screen, after which if you already have an account, authenticate by entering email address e Password e pigging your pulse Log inotherwise proceed to registering a new profile choosing one of the options on the home screen.
In the latter case, press the button to continue Select country/region present on the next screen, in order to access the list of available nationalities. Once the choice has been made, press the button to go to the next step NEXT.
Next, enter yours email address and Password in the appropriate fields, then type the characters of the code that is shown on the display in the small box next to the last field. Finally, put the check mark on the acceptance of thesoftware agreement and Privacy Policy e premium pulsating Sign Up.
At this point, all you have to do is fill in the last requested information, ie Gender, Birthday, Height e Weight :, keeping the remaining fields as such (unless you want to change your activity, calorie and sleep goals based on your particular needs). Bear in mind, however, that you can also change these preferences later via the app menus.
When finished, tap the button Done and, when the main screen starts, presses on the wording I understand and agree present on the disclosure that is contextually proposed to you, then authorize the app's access to multimedia content and photos by pressing the button Allow.
It is also essential to verify that the Bluetooth is active on your smartphone. If you have a device Android, swipe down from the top of the display to load the quick settings, then find the icon of Bluetooth and, if the latter is not "on", press on it to activate the wireless connection mode in question.
Alternatively, you can also check from Settings of your smartphone, by pressing the icon with the gear symbol, selecting the item Connected devices and, to follow, by pressing on Connection preferences > Bluetooth: bear in mind, however, that the layout of the menus may vary from model to model.
If, on the other hand, you have a iPhone, you need to access the home screen and open the Settings: on the screen that will load, you will have no difficulty locating the item Bluetooth. If, next to the latter, the wording appears No, in this case it will be necessary to tap on it and then move up ON the rise therein.
These are the essential preliminary operations to proceed with the association of your "smart watch" with the telephone: in order not to leave anything to chance, in the next chapters I will illustrate the procedure for two particular models, i.e. the smartwatch Amazfit bip s and the bracelet (or smartband) Amazfit Band 5, so you can get a complete overview of how these devices work.
How to connect Amazfit Bip to your phone
If you are looking for instructions on how to connect amazfit bip to phone, just follow the few simple instructions that you find below: consider, however, that they are also valid for other Amazfit smartwatch models and you can also refer to them if, for example, you want to learn how to connect Amazfit GTS to your phone.
To get started, launch the app from your smartphone Zepp, which I told you about in the previous chapter and make sure you have the Bluetooth active on the phone, then press the button Profile located at the bottom right.
Next, tap the button Add device under the section I my device and, on the next screen, tap on the option Clock, then tap on the entry I understand and agree in the information note that is shown to you.
To proceed, you need to enable the app to access a series of functions on your mobile phone: you will therefore be asked to allow the Location and, to do so, you will have to select the item Only allow while using the app.
The Zepp application also provides for the possibility of a login continuous to the position: therefore, in the next step you will also have to choose among the options Consenti semper, Stay logged in while in use (to keep the permissions established in the previous step) o Keep it and ask no more (to ensure that the request is not repeated again).
Once this is done, press the wording again I understand and agree on the next notification, then give Zepp permission to take pictures pressing the button Allow. At this point you will be prompted to choose the mode pairing with the smartwatch among the options Watch with QR Code e Watch without QR code.
The model that I examined, named Beep S, on first use, or in any case when it is not associated with a telephone, shows on the display a QR code: therefore, in this case it is necessary to select the first item. This option, as I anticipated at the beginning of this chapter, is also valid for other models: the procedure, in fact, is identical even if you want to know how to connect Amazfit Pace on the phone, or if you are looking for some clarification on how to connect amazfit verge to phone.
Once you have made the above choice, the app will ask you to point the rear camera of the smartphone on the QR code shown on the watch display. At this stage, I advise you to press the side button of the latter to light up the screen and make the QR Code more visible. Once this is done, perform the operation in question trying to center the code at the inside the dedicated frame shown by the camera functionality.
As soon as the association is performed, a message will appear on the phone display informing you of the correct identification of the smartwatch: at this point, to confirm the operation, all you have to do is tap on the green check mark that appears on the watch screen. If you do not perform this operation within a few seconds, however, the procedure will be canceled and you will have to repeat it again.
When done, wait for the app to run the automatic configuration of the device: finally, you will see a notification of positive outcome and you will be able to use the various functions of the app and a complete synchronization of the two devices.
How to connect Amazfit Band 5 to phone
If you have opted to purchase one smartband Amazfit, the procedure to follow does not vary much from what is indicated in the previous chapter. Let's see, for example, how to connect amazfit band 5 to phone, one of the most popular products in this particular segment.
If you have already performed the preliminary operations that I told you about in the initial chapter, in particular the installation of theWhatsapp reference for Amazfit wearable devices, registering a account and verification of the activation of the Bluetooth on mobile, there are very few steps that separate you from achieving your goal.
Appetizers launch the Zepp app, then press the button Profile located at the bottom right and, on the next screen, press the button Add device, then select the item Bracelet. As in the case of the Bip smartwatch I told you about in the previous chapter, the application will ask for permissions to access the position, which is particularly useful for monitoring certain activities proposed by the app.
Next, focus your attention on the Band 5. First of all set the language scrolling with your finger through the various options that are offered to you on the start screen and tapping on the desired one, then press the arrow placed at the bottom: this will put the device into pairing mode.
At this point bring the two devices together and wait for it to run pairing: confirmation will be provided to you from a special screen which will notify you of the positive outcome of the operation, but you will need to proceed with further confirmation by quickly tapping on the blue check mark in the smartband display.
Finally, wait for theinitialization of the device on the app: once this phase is completed, you will see the profile screen in which, this time, the association with Amazfit Band 5 complete with information relating to the status of the battery and, further down, the menus for accessing the configuration of the various features.
Deprecated: Automatic conversion of false to array is deprecated in /home/soultricks.com/htdocs/php/post.php on line 606


