Altervista it's a provider free and is a large virtual community born in 2000 that offers a free and complete service to all who want post on Web its own site.
There is no deadline for websites open on Altervista. A site may even be out of date for one or two years and still remain active. Furthermore, as we will see, it provides an intuitive control panel for the publication and management of your site.
On Altervista we can create a simple Blog where to publish our pages or a Real site. If we decide to create a site on Altervista we are granted a Registration bonus of 5 euros.
Let's see together how to create our site.
Go with the registration
Let's go to the Home Page of Altervista and as we can already see on the home page, there is a Continue button to start the publication procedure. With a click on the button you can access the registration page, where we have to specify the data of the our website and some personal information. In order to publish our site on the Altervista web space, we must first become part of its community.
We choose the name
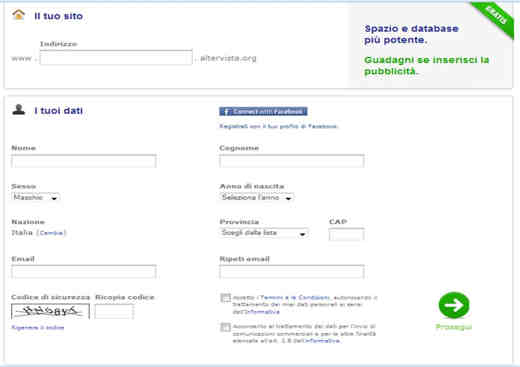
Registration does not involve any constraints, only the communication of an e-mail address, where an advertisement will arrive from time to time. We insert the name of our site, then the name that will appear on the Net. It is sufficient to specify the central part of the name: the prefix and the suffix are added automatically. So if we write soultricks, the address becomes www.soultricks.altervista.org.
We accept the terms of use
We insert in our personal data and carefully copy the security code that is shown to us: server to the site managers to avoid avalanche registrations with automatic programs for filling out forms. Remember to tick the boxes that commit you to use the service in compliance with the regulations and those relating to the processing of personal data. When finished, we click on the button Continue.
Attention: the chosen name is no longer editable. We click on Continue.
A confirmation email
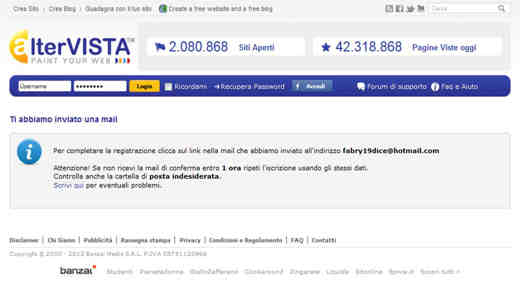
At this point, if the registration of the site was successful - therefore the data were correct, or there is no site published with the same name, etc. - a window appears with a text informing us that a 'email with all login details and a link to click for confirm registration, thus activating the account. Warning: after activating the account we will receive a second email with username and passwork to access the control panel of our new website or blog.
We confirm the registration
As indicated in the email, the account must be activated, i.e. to confirm access to the Altervista service: click on the link specified at the beginning of the confirmation email. After a few seconds of waiting, the browser displays a window with a welcome message. The registration process is complete: a web address has been assigned to the site and we are ready to use the service.
The Control Panel
Once you have registered, you need to prepare the pages that will make up our site: content, structure, images, links, etc.
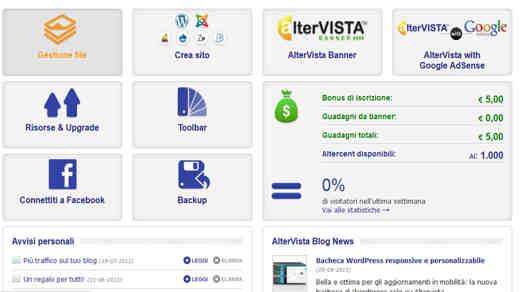
If we decided to create a site we are faced with a complex control panel consisting of:
- File management: where we can manage the files to be uploaded to our site.
- Create Site: we can choose the language to be adopted for our site, in this case we recommend WordPress, or decide whether to create a forum or a photo gallery.
- Resources and Upgrades: specify the space you are using. In case you want to increase it, you need to pay a small amount. Other information is given on traffic and on the database.
- Toolbar: we can create a custom toolbar and insert the highlighted elements in order to keep an eye on the google pagerank, our favorite sites, the icon and the name of the site, etc.
- Connect to Facebook: are a series of useful services to share on Facebook such as: advertise your site, share your link, publish your blog updates via RSS Feed, etc.
- Backup: it is a partly free and partly paid service and can be monthly, weekly or yearly. If you have enough AlterCents (you get them by inserting banner ads and earning money) you can also get it for free.
- Altervista Banner: we can choose the banner to use and customize the size and colors. By activating the advertising banners on the site, both pay-per-click (pay per click) and pay-per-view (pay per view) banners will be delivered randomly. The earnings of each banner are expressed in Centennial Euro (Cent) out of AlterCent (AC) for 1000 unique views. The Altavista format that makes moneyking more is that 300 × 250, and can be inserted in any site. Just copy the banner code and paste it into the HTML of the pages, the banner will be immediately active and will allow you to start earning immediately.
- Google Adsense on Altervista: if we already have a Google Adsense account we can use the banners on the site that Altervista hosts but we will get 65% of the revenues generated with Google AdSense plus the revenues generated by Altervista. These revenues will vary based on the type of banner chosen.
In conclusion, there is another special remuneration and that is the Altervista Banner Video 300 × 250. If you place a AlterVista Banner Video 300 × 250 at the top of the page and add a any banner of the circuit AlterVista with Google AdSense: you will get special remuneration. This combination will guarantee a 15% bonus on the impressions of the AlterVista Video Banner
Some guidelines of the File Management section
The first page must necessarily be called index.html or index.htm or index.php, always all lowercase. When specifying the file names of images, movies, sounds, other web pages, in the HTML code you must avoid capital letters, spaces and all those characters other than alphanumeric ones. Also, it is best to avoid the underscore [_] character and the hyphen [-] character.
Let's go to the home page and click on the link Access the control panel, in the next window we insert the username and password that arrived with the confirmation email and click on Log in. On the next screen, in order to publish the site, we need to click on the entry AlterSito o Public and from the menu choose the item Management Fillet.
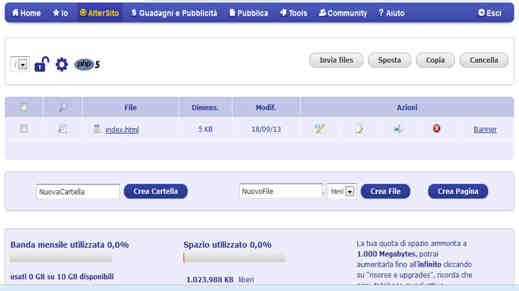
The page displayed is the Altervista control panel. Here are the commands to update and publish the site. We see that the index.html file is already present, to view our site we have to do is replace the index.html already present with ours. In practice you have to click on the button Select files, go to the folder that contains our index.html file and click on the button Send Files before and on the button Go back to File Manager onwards.
Not just Home Page
To complete the construction of the site we must upload all the files that are part of it, with their respective folders. In practice, we must reproduce the same situation that we have on our computer. For example, if on our PC we had stored the images, sounds, other web pages in a folder called "material", we must create, from the Altervista control panel, a folder with the same name and insert the files inside it. that are present in the "material" folder of our computer.
To create the folder just press the button Create Folder. At this point the new folder is present in the site. To insert files into this directory, you have to open a click on the folder name or on the command apri. Now the material folder has been opened: to insert the desired files, press the button Send files and repeat the steps described above.
When we have loaded everything we can exit the Control Panel with a click on the command Logout top right. The site is ready and can be reached at the web address specified in the welcome email.
Deprecated: Automatic conversion of false to array is deprecated in /home/soultricks.com/htdocs/php/post.php on line 606


